dragon's lair treasure chamber with hoards of gold coins
Explore a steamy dragon's treasure chamber at noon with two adventurers contemplating their next move. Spot the differences as shadows grow long…
About this scene
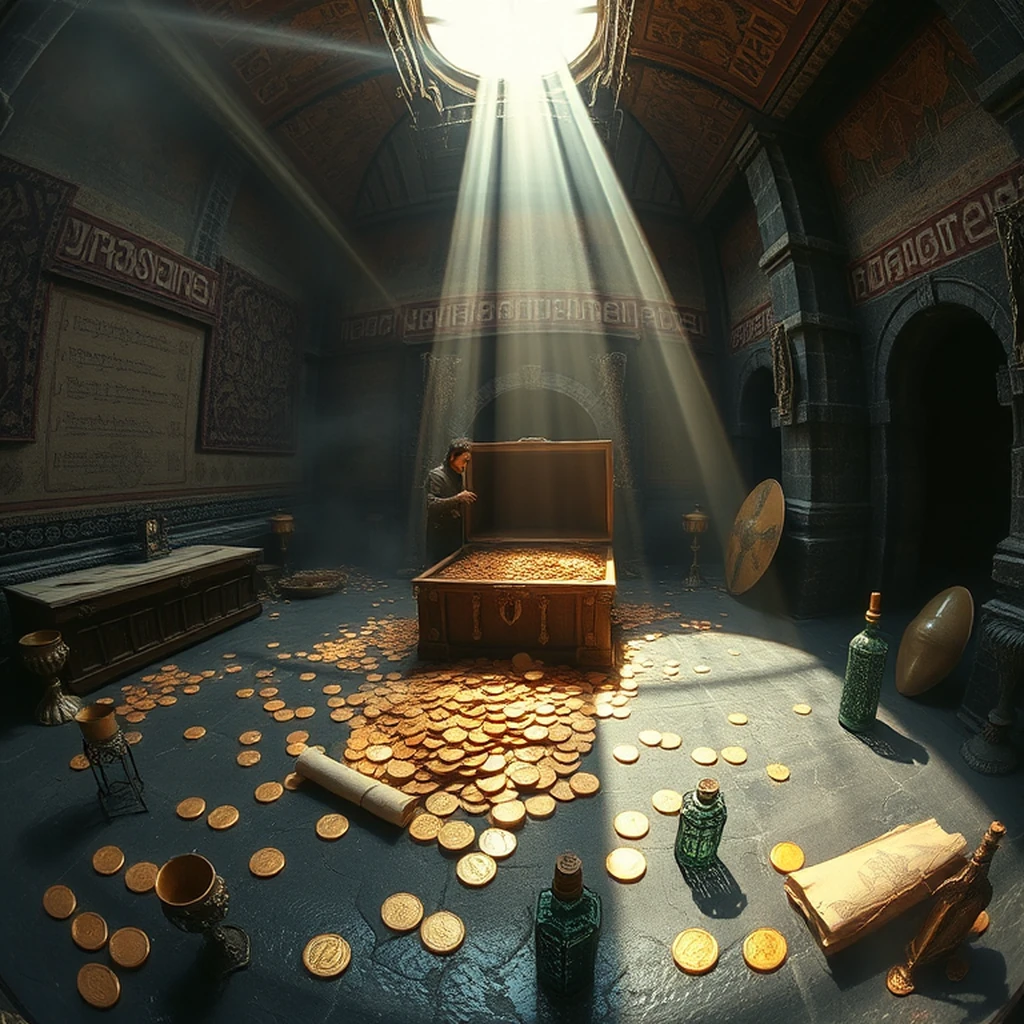
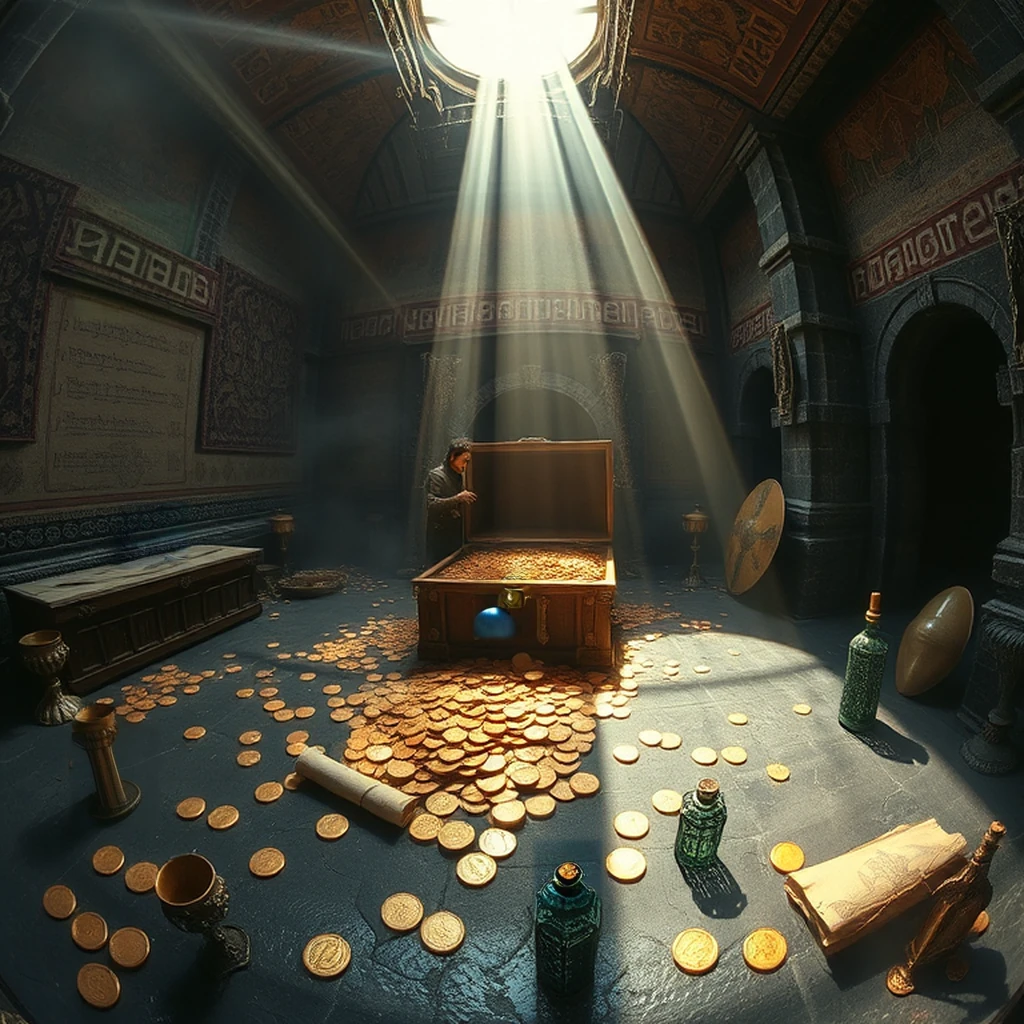
A dragon's treasure chamber under harsh noon sunlight, where steamy humidity clings to the air and copper coins shimmer in pools of light on a charcoal-black floor. The room is wide but enclosed by walls adorned with ancient runes and tapestries that tell tales of old. Two adventurers whisper nervously near an open chest filled with gold, contemplating their next move as shadows grow long. Small props include dripping chalices, scattered scrolls, tarnished shields leaning against a pillar, and intricate glass bottles on the floor.
The dragon's lair is bathed in the harsh glare of noon sunlight that filters through narrow slits in the ceiling, casting elongated shadows and pools of golden light upon the darkened floor. Copper coins glisten with each shifting ray, their metallic sheen catching every glint and shadow as if to mock the adventurers who dare approach them. The walls are an intricately carved tapestry of ancient runes and faded tales, telling stories of past conquests and lost treasures. Steam rises from the humid air like a silent witness to the chamber's hidden secrets, curling around dripping chalices and scattered scrolls that rest upon the floor alongside tarnished shields leaning against a pillar and intricate glass bottles filled with unknown elixirs or poisons. In this claustrophobic yet expansive space, two adventurers whisper nervously by an open chest brimming with gold, their eyes darting between each other and the dark corners where shadows play tricks on their minds. The contrast of the gleaming treasure against the charcoal-black floor creates a stark visual tension that heightens the sense of danger and excitement. Each object in the room contributes to this atmosphere: the tarnished shields bearing silent witness to battles long fought, scrolls crammed with secrets and warnings, and glass bottles containing mysteries yet to be unraveled. This scene is particularly intriguing for a spot-the-difference puzzle as it invites players to delve into the rich textures and hidden details of an ancient dragon's lair, where each element holds clues or tells its own story in the grand narrative of this fantastical world.
Background
The scene depicting the dragon's lair treasure chamber draws inspiration from medieval European folklore and literature where dragons are often portrayed as guardians of vast hoards of wealth. These tales typically originated in regions like Germany, Scandinavia, and England during the Middle Ages when myths and legends flourished amidst a largely illiterate populace who relied on oral storytelling traditions to pass down knowledge and entertainment through generations. In these narratives, dragons were seen not just as fearsome beasts but also as symbols of untold riches hidden deep within mountain caves or under ancient ruins. The treasure chamber illustrated here encapsulates the allure of such stories with its abundance of gold coins and artifacts that evoke a sense of mystery and adventure. The dripping chalices, scattered scrolls, tarnished shields leaning against pillars, and intricate glass bottles suggest an environment rich in historical allusions to medieval knightly quests, scholarly pursuits, and alchemical experiments. These objects hint at the intersection between fantasy and reality during this period when knights were both real warriors and legendary heroes, scholars sought knowledge from lost civilizations, and alchemists searched for mythical substances like philosopher's stone. The inclusion of ancient runes and tapestries further enriches the scene by alluding to the rich cultural heritage associated with Norse mythology or Celtic legends where such symbols played significant roles in storytelling and spiritual practices. This photorealistic depiction uses fish-eye wide-angle distortion, creating a surreal yet captivating atmosphere that immerses viewers into the world of medieval fantasy. While not tied directly to any specific art movement like ukiyo-e or art deco, the style emphasizes details and textures typical of high-resolution digital renderings, making the ancient artifacts appear almost lifelike in their decayed beauty. The noon sunlight piercing through steam-laden air adds a mystical quality, as if time itself has paused within this chamber where legend meets reality.
Tips for this puzzle
When you're hunting for those five differences in today's puzzle, remember that the dragon’s treasure chamber is a place of mystery and shadows. The fish-eye wide-angle distortion might make some objects look bigger or smaller than they would be normally, so pay extra attention to details like the ancient runes on the walls and the intricate patterns of coins scattered across the floor. Look closely at areas where light and shadow meet; that’s often where small differences are cleverly hidden. The steamy atmosphere could blur some edges slightly, making it tricky to spot tiny discrepancies. Don’t forget about those dripping chalices and glass bottles on the ground—they’re small but important props that might conceal something unusual. As you scan the scene, try moving your eyes in a grid pattern across the image to cover all areas methodically. Happy hunting!
How to play
- Two near-identical images are shown side by side.
- Tap or click on the differences before the countdown timer runs out.
- Wrong clicks subtract 5 seconds from the clock.
- Stuck? Spend a hint token to glow one remaining difference.
About this puzzle
This is one of 633+ hand-curated AI-generated spot-the-difference puzzles in the SpotDiff library. Each puzzle has multiple variants — the differences you see on your first play are different from the next. 3 variant(s) for this scene.
SpotDiff is free to play with no signup required, and the library grows daily — roughly 10-30 new puzzles added every day. Hint tokens are earned through daily login, streaks, and referrals — or buy a bundle if you want unlimited hints. Refunds are available within 7 days, prorated by the tokens you haven't used yet.