Abandoned Soviet space station control room with flickering CRT monitors
Spot the differences in an abandoned Soviet space station control room with flickering CRT monitors and scattered debris. Solve this historical…
About this scene
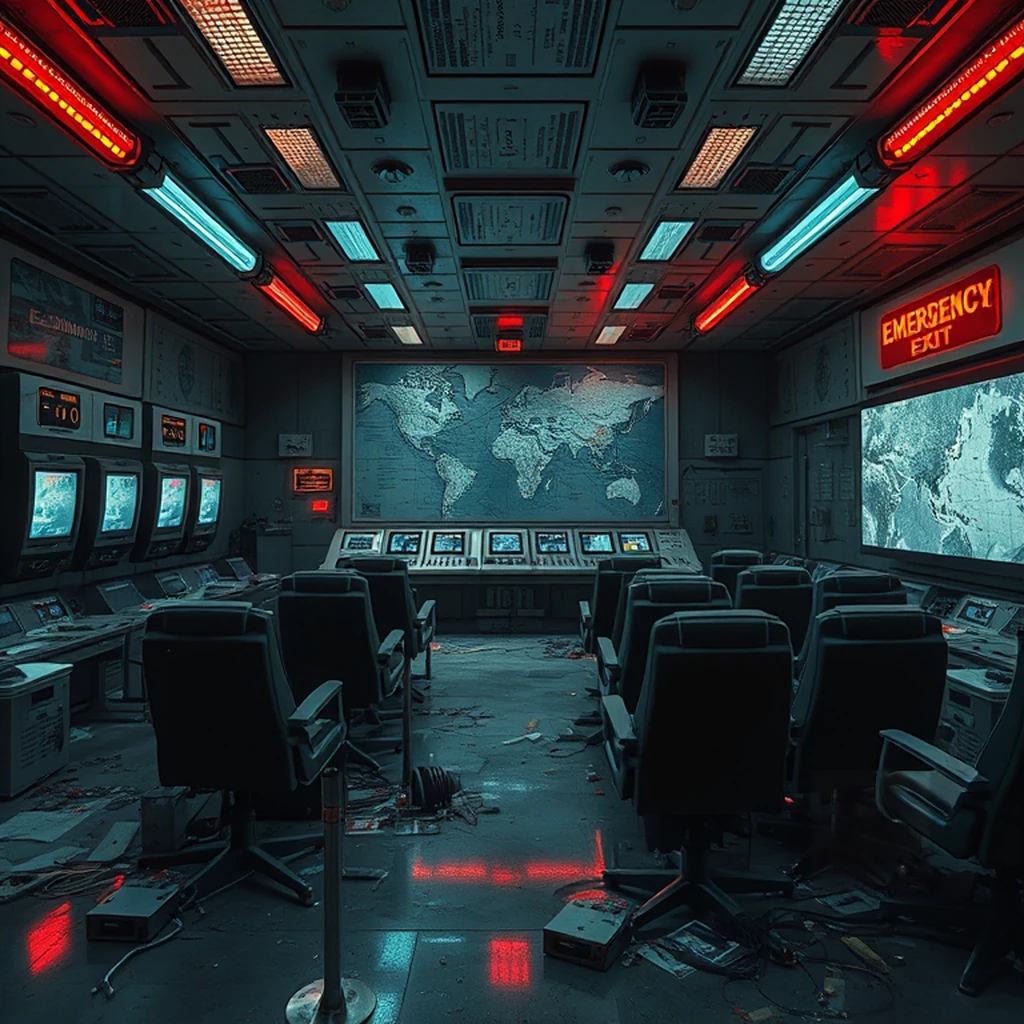
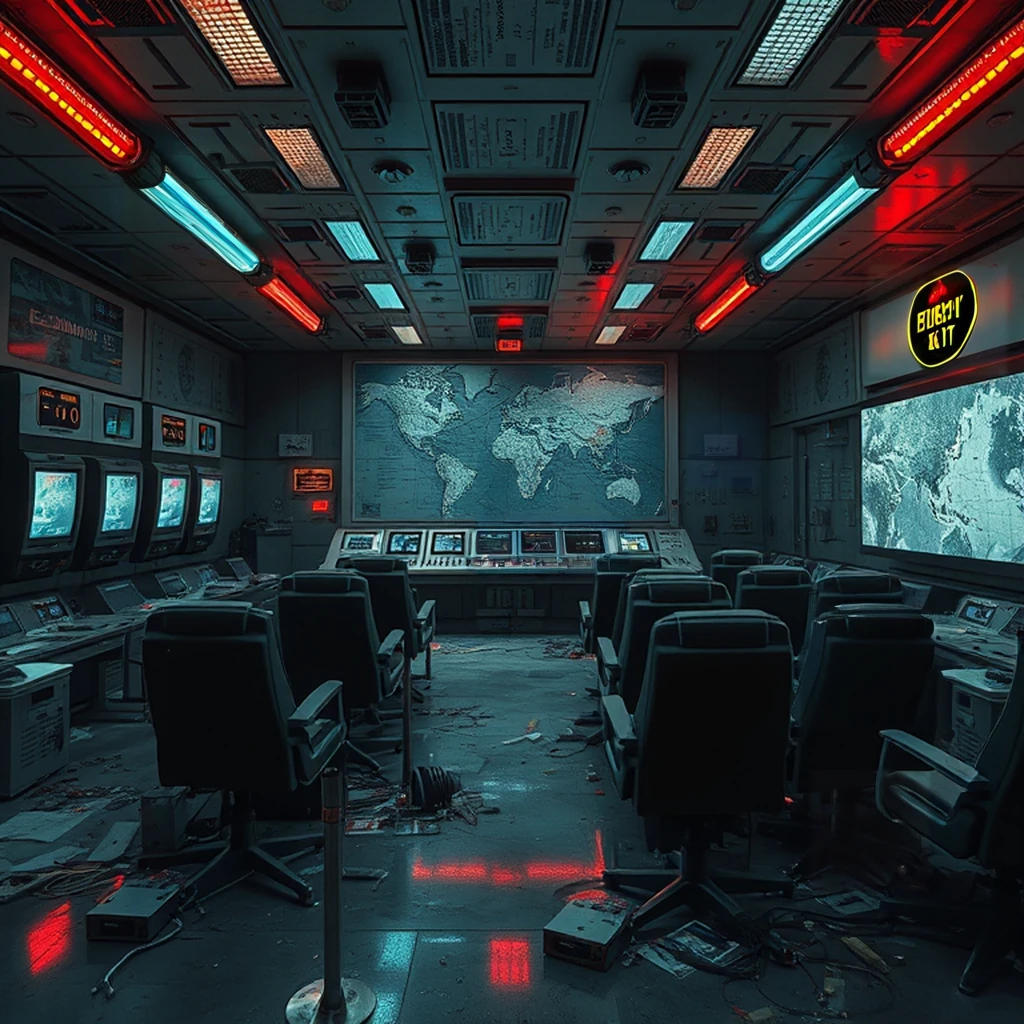
A photorealistic abandoned Soviet space station control room with flickering CRT monitors, dim red and blue emergency lights on the ceiling, scattered debris on the floor including metal tools and broken circuit boards, rows of dark green leather chairs facing a central console panel with blinking indicator lights, large monochrome maps taped to the walls showing star systems and navigation routes, cracked glass panels over some screens revealing internal wiring, flickering neon signs in Cyrillic letters reading 'emergency exit', reflections on the wet metal surfaces, evenly lit, photorealistic, coherent composition
The abandoned Soviet space station control room is cloaked in an eerie dimness, with the occasional flicker of CRT monitors casting ghostly blue and green hues across the walls and scattered debris. The air hangs heavy with silence and the distant hum of failing electronics, punctuated by the soft hiss of leaking oxygen tanks or perhaps a malfunctioning air filter. Red and blue emergency lights cast long shadows, their cold glow dancing off wet metal surfaces speckled with rust and condensation, hinting at the station’s prolonged neglect. Scattered across the floor are tools of past repairs—pliers twisted out of shape, broken circuit boards, and tangled wires that trail like abandoned lifelines to nowhere. Dark green leather chairs, still arranged in rows facing a central console panel, bear the marks of countless hours spent watching over star systems now long forgotten. The panel itself is a testament to a bygone era, its blinking indicator lights casting eerie glows on cracked glass screens and monochrome maps taped to the walls showing intricate star systems and navigation routes that seem almost poetic in their abandonment. Neon signs in Cyrillic letters for emergency exits flicker intermittently, their glow adding an unsettling rhythm to the otherwise still air. The scene is a vivid reminder of the grandeur and tragedy of human exploration, where dreams once thrived but now only shadows remain. This desolate yet meticulously detailed control room offers a captivating challenge for those seeking to spot differences amidst its layers of history and decay, inviting players to uncover hidden truths within its cold embrace.
Background
The abandoned Soviet space station control room depicted in this scene evokes the era of Cold War technological competition and ideological rivalry between superpowers. During the late 20th century, both the United States and the USSR raced to demonstrate their dominance in space exploration and military might through ambitious space missions and advanced technology development. The Soviet Union led early achievements such as launching Sputnik, the first artificial satellite, and sending Yuri Gagarin into orbit as the first human astronaut. This room reflects that historical period's unique blend of Cold War paranoia and technological ingenuity. The control panel with its dark green leather chairs and rows of flickering CRT monitors showcases Soviet industrial design aesthetics from the time. Functional yet imposing, these objects convey a sense of authority and control over space operations. The Cyrillic emergency exit signs, star system navigation maps, and detailed circuit boards scattered about add to the authenticity of this abandoned Soviet outpost, hinting at its former role in global geopolitical strategy. The eerie silence and decay visible now highlight the eventual downfall of the USSR and the abandonment of such grand projects due to economic collapse. This room encapsulates a poignant moment where history meets science fiction – a relic of an era when space was not just explored but used as a stage for ideological battles between nations.
Tips for this puzzle
When you're on the hunt for those five differences in our Soviet space station scene, take your time and really soak it all in. With rows of dark green leather chairs and a central console panel loaded with blinking indicator lights, there are plenty of spots where little changes could be hiding. Keep an eye out for intricate patterns on maps taped to the walls and flickering neon signs reading 'emergency exit'—these areas often have subtle differences like slightly altered text or a missing light bulb icon. Shadows cast by debris scattered across the floor can also hide small details, so make sure you don’t miss those dark corners where wires peek out from cracked glass panels. And as you scan systematically, don't forget to look closely at the wet metal surfaces and reflections—they often play tricks on your eyes and might obscure a minor detail here or there. Happy spotting!
How to play
- Two near-identical images are shown side by side.
- Tap or click on the differences before the countdown timer runs out.
- Wrong clicks subtract 5 seconds from the clock.
- Stuck? Spend a hint token to glow one remaining difference.
About this puzzle
This is one of 633+ hand-curated AI-generated spot-the-difference puzzles in the SpotDiff library. Each puzzle has multiple variants — the differences you see on your first play are different from the next. 3 variant(s) for this scene.
SpotDiff is free to play with no signup required, and the library grows daily — roughly 10-30 new puzzles added every day. Hint tokens are earned through daily login, streaks, and referrals — or buy a bundle if you want unlimited hints. Refunds are available within 7 days, prorated by the tokens you haven't used yet.